Reference Forms are reusable templates designed for signature requests, built with signer roles and fields already in place. They provide your team with a consistent, efficient starting point for your most frequently signed documents.
Reference Forms make it easy for your team to send signature requests for the documents they need to get signed most often.
Built by admins from PDFs in your shared Reference Library, each Reference Form serves as a structured, reusable starting point. Fields for signatures, initials, and key transaction details are already in place, with signer roles assigned ahead of time.
When it's time to send, team members just select a form, fill in the specifics, and hit send.
The result? Fewer mistakes, less back-and-forth, and a smoother signing process from start to finish.
Admins Create the Form
Master Admins build Reference Forms from PDFs stored in the shared Reference Library. They define all possible signer roles and place the key fields like signatures, initials, and transaction info where they should appear on the document.
This creates a reusable, structured template your team can use for signature requests again and again.
Smart Signer Assignment
Admins can include every potential signer role up front, but when the form is used, the system automatically includes only the relevant signers based on the request. This keeps the process clean and focused.
Team Members Prepare and Send
When it's time to send a signature request, team members select the right form, review it, and fill in any deal-specific details. All fields are editable, so senders can adjust, add, or remove anything to make sure the request fits the specific situation.
Signers Review and Sign
Signers receive a secure link with only the fields they need to complete. The experience is clear, fast, and works on any device.
Turn a Reference Doc into a structured, reusable form with the key fields already in place for senders and signers.
Who Can Do This: Master admins whose company is subscribed to Pipeline eSign.
To create a Reference Form:
- Go to Your Reference Library
- Click [Reference] from the top menu.
- Choose a Doc to Convert
- Find the PDF doc you want to turn into a form.
- Click the gear next to it and select [Convert to Form].
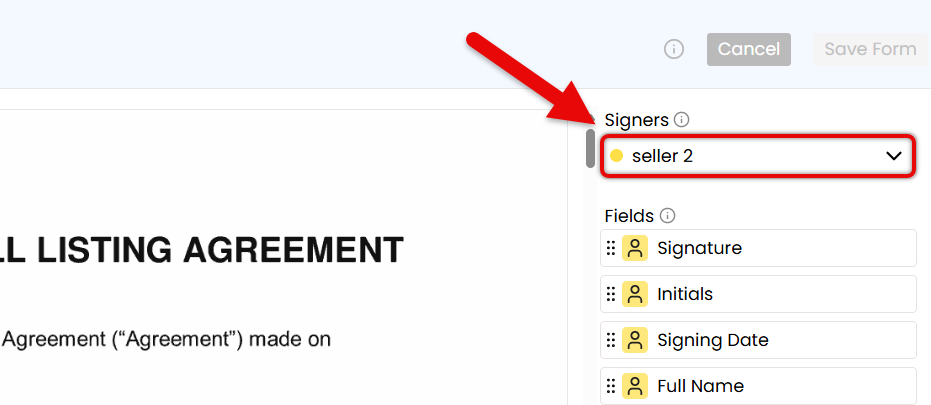
- Select a Signer
- Click the Signers dropdown and choose the role of someone who will always sign this form.
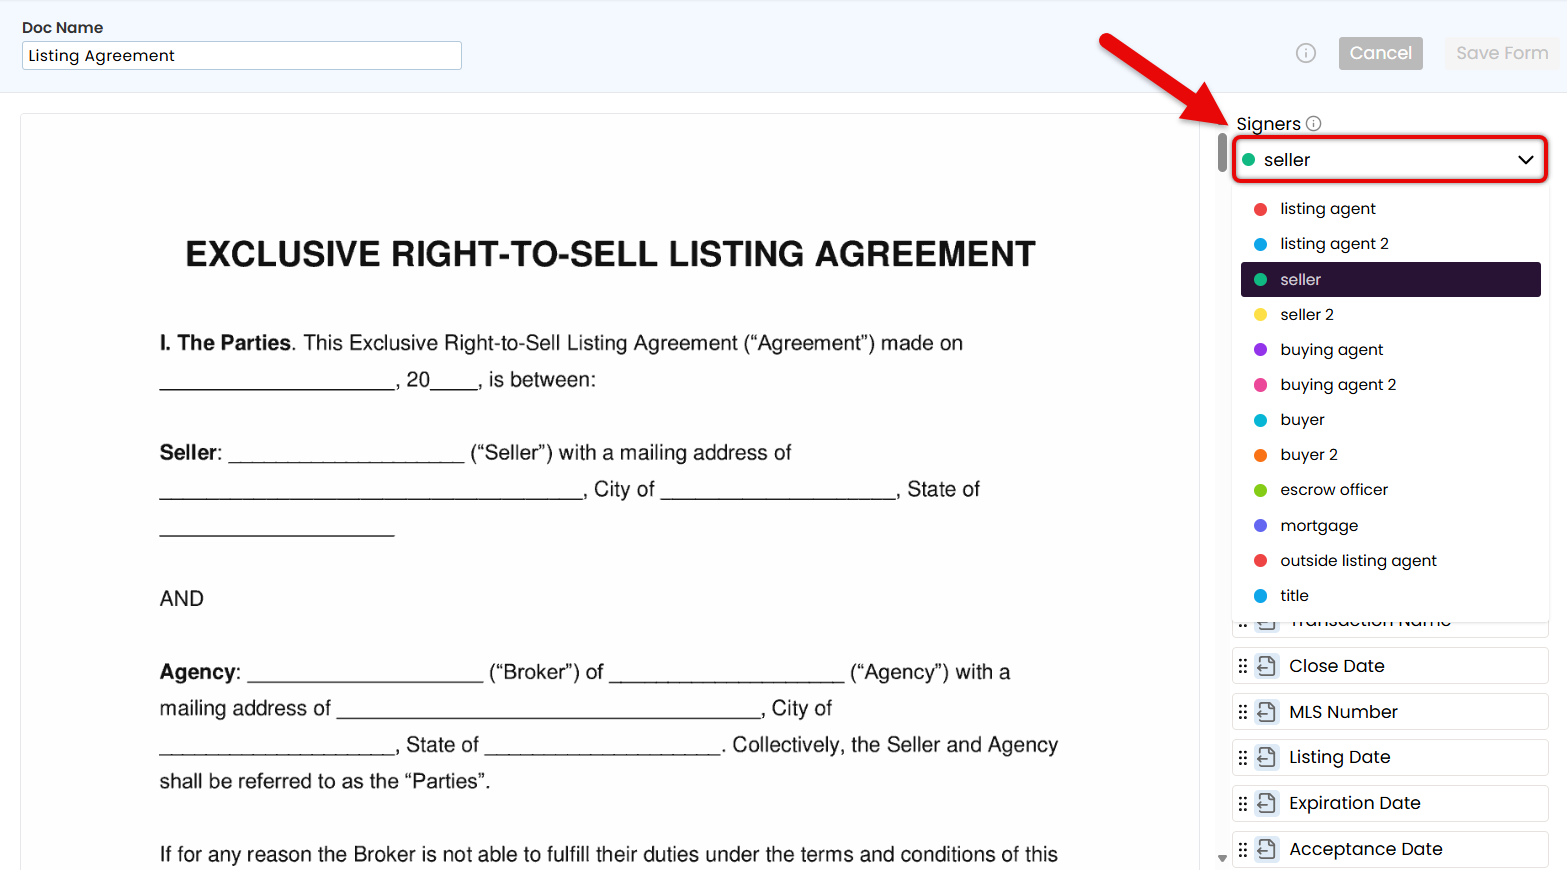
Start with the primary signer — someone who always signs, like the Seller or Buyer. This keeps the form organized and fields tied to the right roles.
- Add Fields to Set the Form Structure
- Drag and drop your desired fields from the right menu onto the doc (outlined below).
Autofilled Transaction Info
Insert the available
 Transaction Info fields to automatically pull key details directly from the transaction, like Transaction Name, Listing Date, and Buyer Name(s).
If the information is unavailable, the sender must enter it before sending.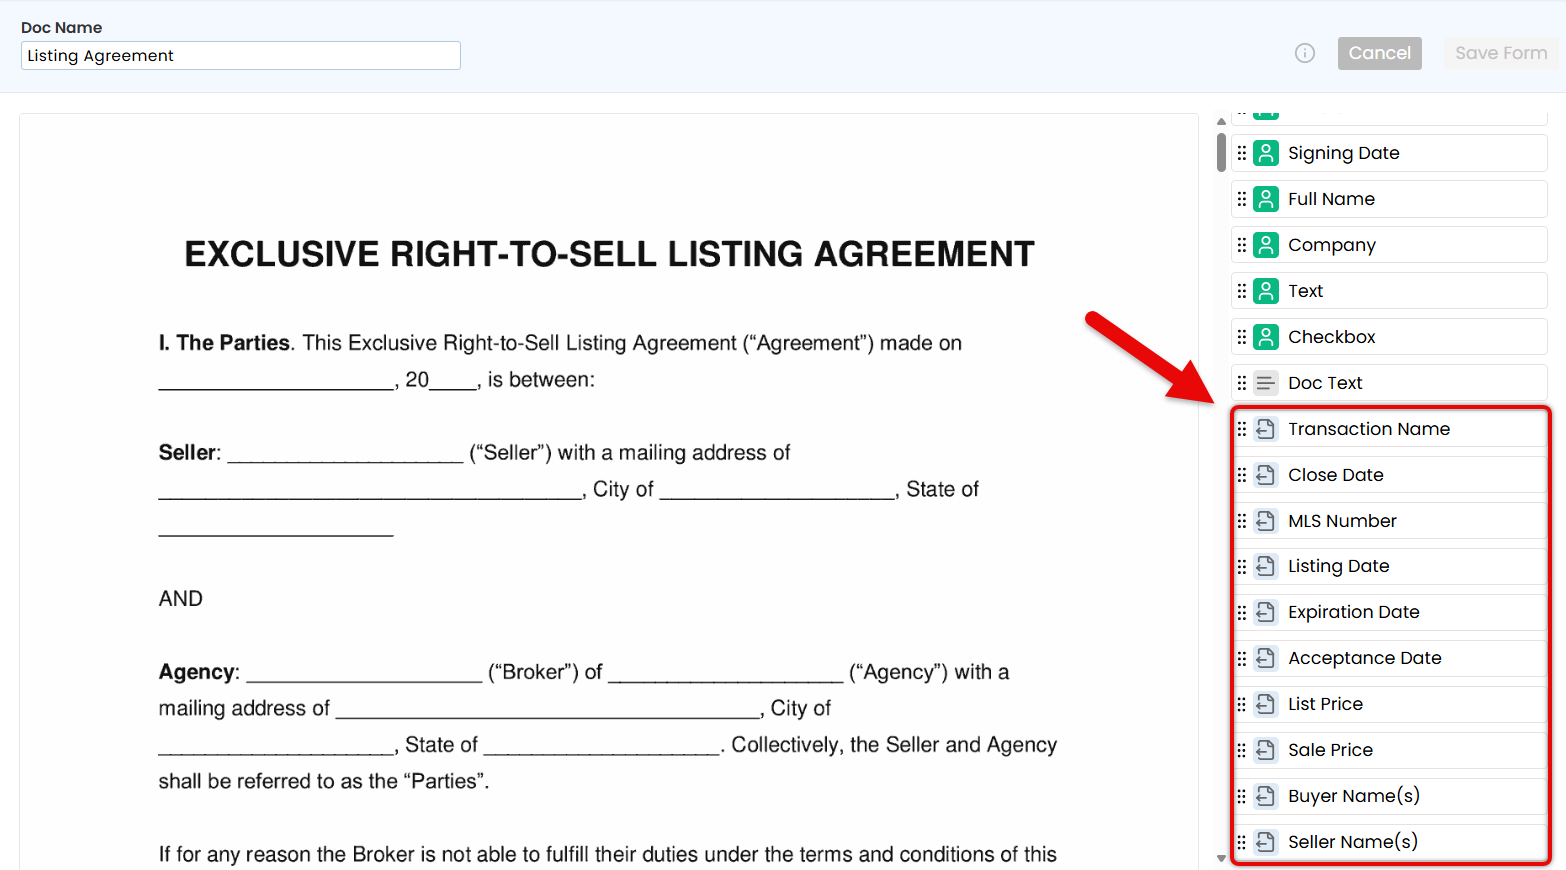
Document Text
Insert
 Document Text for standard text that should appear every time the form is used, like brokerage name, company details, or required legal language.
If the placeholder text hasn't been updated, the sender must enter it before sending.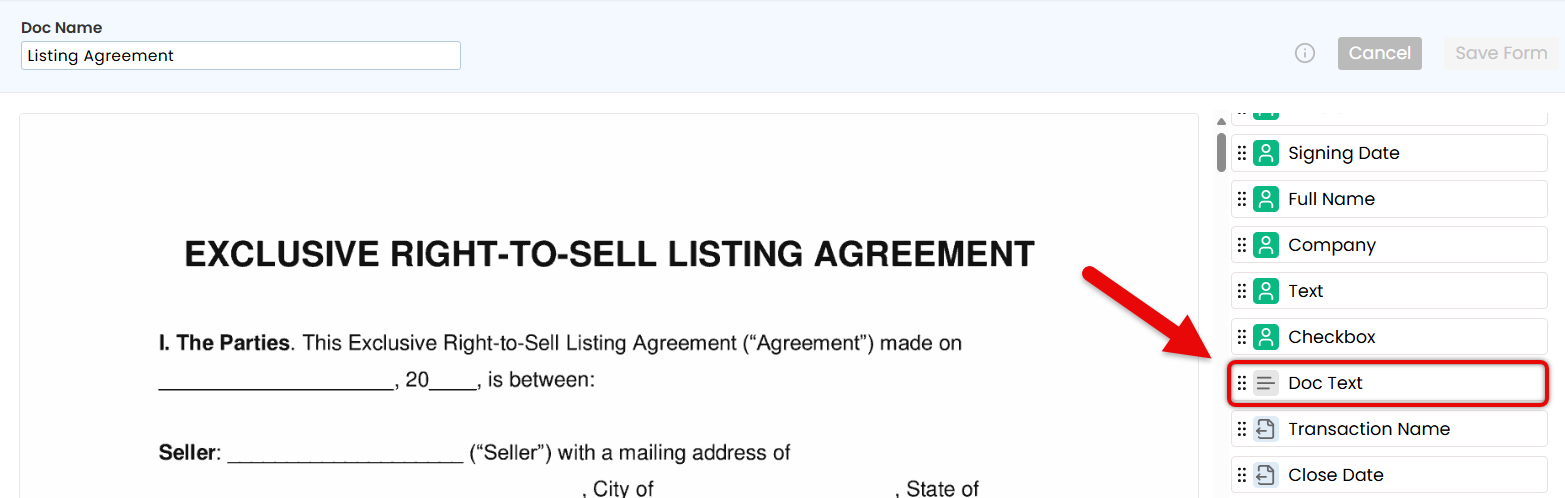
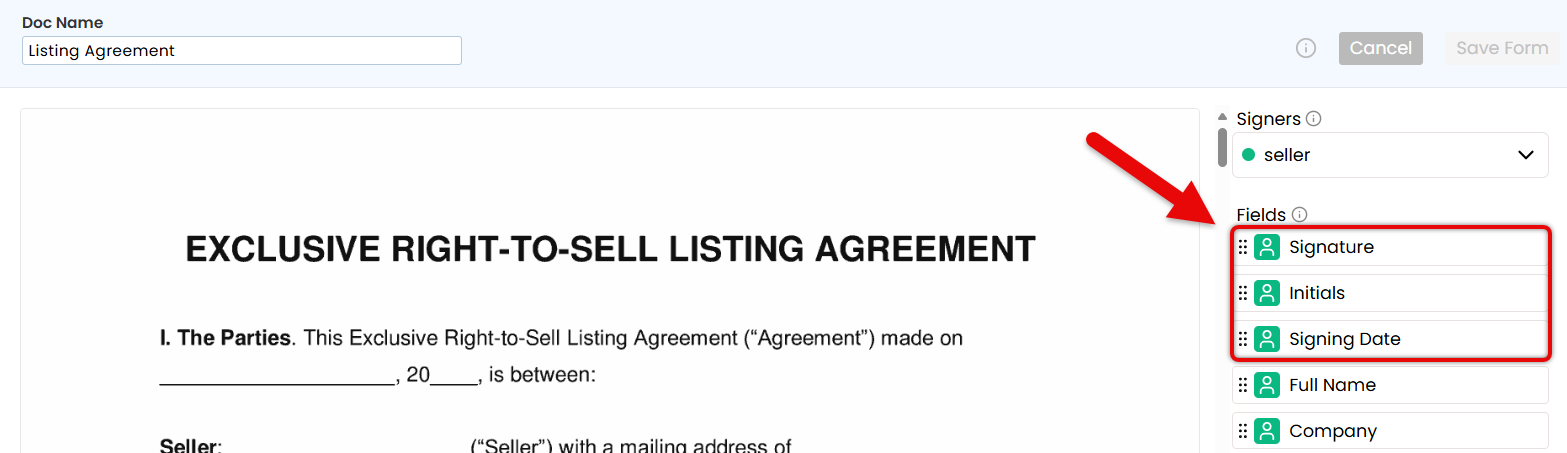
Signer Fields
Insert fields the signer is responsible for completing: Signature, Initials, and Signing Date.
Flexible Fields
Insert flexible fields that can be completed by either the sender or signer, depending on who has the information at the time.
- Add Full Name and Company fields to automatically pull signer details directly from the transaction.
- Add a Text field when you need a flexible space that either the sender or signer can fill in with custom information.
- Add a Checkbox field when you need something acknowledged, required, or reviewed every time the form is used.

Need help choosing the right fields? Check the Signature Fields Reference Guide for details on each field type.
- Drag and drop your desired fields from the right menu onto the doc (outlined below).
- Add Additional Signers & Place Their Fields
- Use the Signers dropdown to add each signer role, one at a time. Then, place only the fields that apply to each signer to keep the form clean and focused.
- Save the Form
- Once the form is finalized and ready to be used, click [Save Form]. Your team can now use the Reference Form as a consistent starting point for signature requests.

 Transaction Info fields to automatically pull key details directly from the transaction, like Transaction Name, Listing Date, and Buyer Name(s).

 Document Text for standard text that should appear every time the form is used, like brokerage name, company details, or required legal language.


Edit a Reference Form to update fields, signer roles, or content so your team always sends the most accurate and up-to-date version.
Who Can Do This: Master admins whose company is subscribed to Pipeline eSign.
To make changes to a Reference Form:
- Go to Your Reference Library
- Click [Reference] from the top menu.
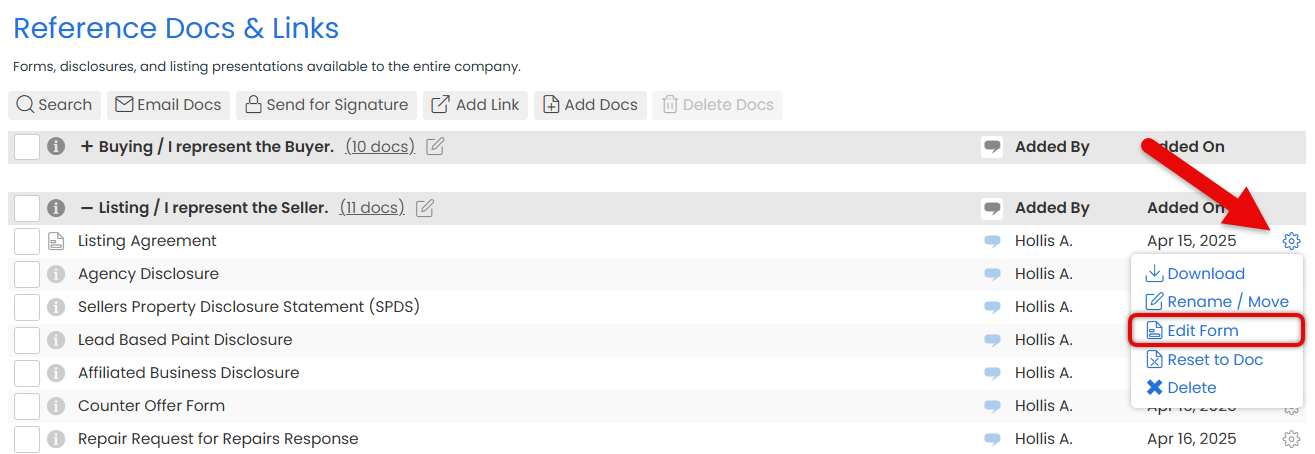
- Choose a Doc to Edit
- Find the Reference Form you want to make changes to.
- Click the gear next to it, then select [Edit Form].
-
Update & Save the Form
- Make your desired updates to the form.
- Click [Save Form].

Reset a Reference Form to clear signers and fields, restoring the original doc for a fresh start.
Who Can Do This: Master admins whose company is subscribed to Pipeline eSign.
To reset a Reference Form:
- Go to Your Reference Library
- Click [Reference] from the top menu.
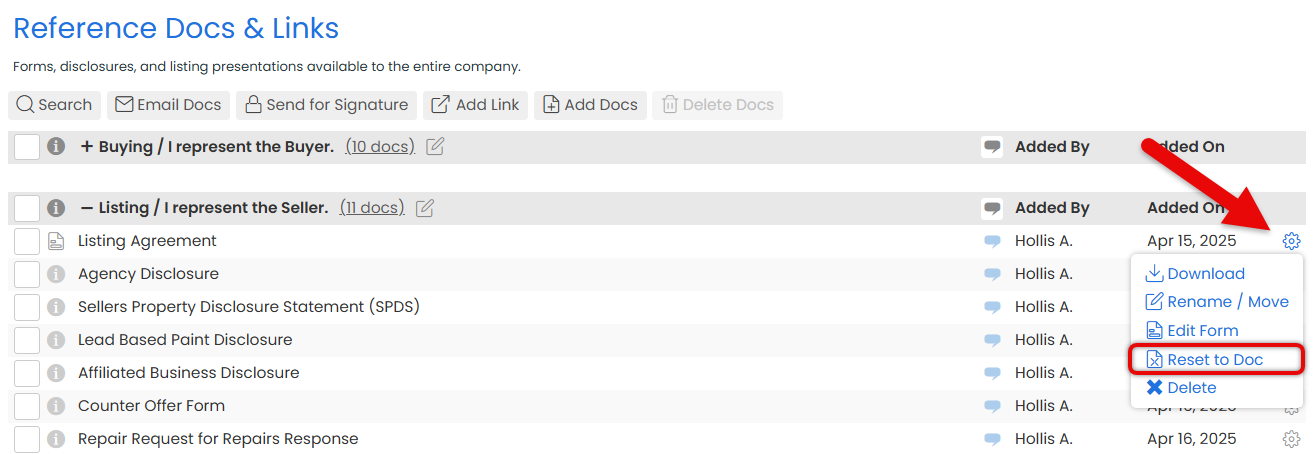
- Choose the Doc to Reset
- Find the Reference Form you want to clear and reset.
- Click the gear next to it, then select [Reset to Doc].
-
Confirm
- Click [Clear] to confirm you want to reset the form back to the origial doc.

View Reference Forms from your Reference Library or within individual transactions.
Who Can Do This: Anyone whose company is subscribed to Pipeline eSign.
To view a Reference Form:
- Access Reference
- You can access Reference Docs from two places:
- Click [Reference] from the top menu.
- Or, open a transaction, and scroll down to the Reference Docs section.
- You can access Reference Docs from two places:
- View Reference Forms
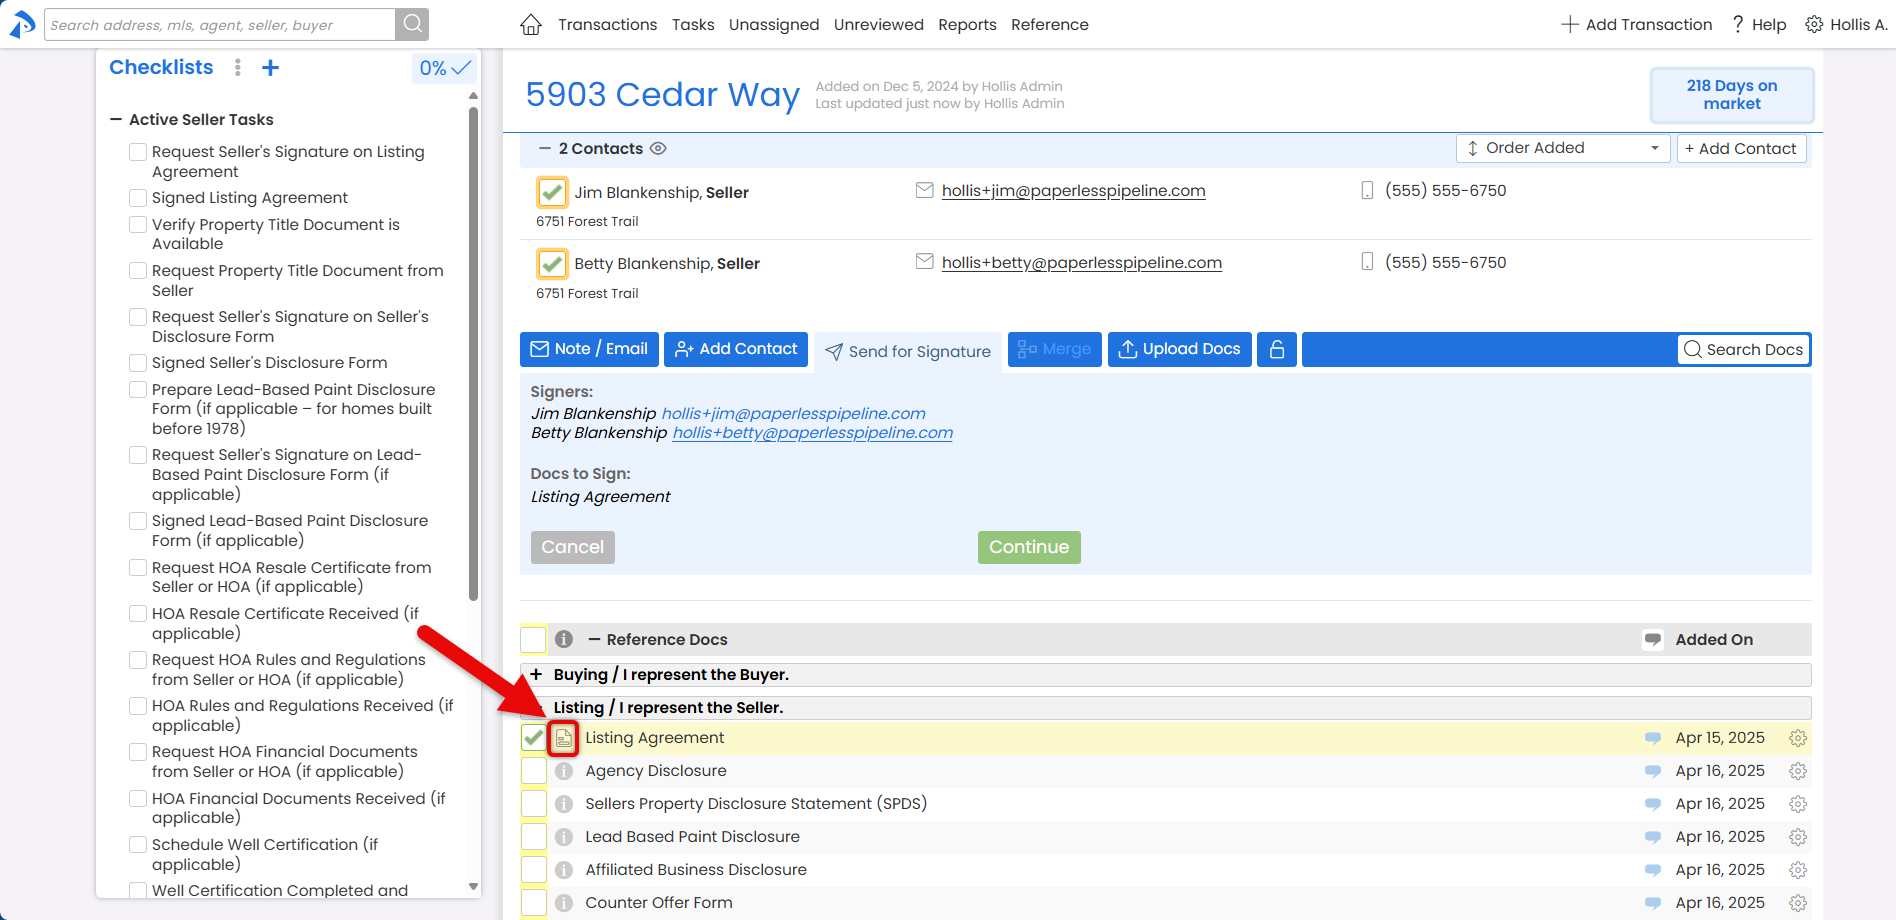
- Look for the form icon in the "i" column, this identifies a Reference Form.
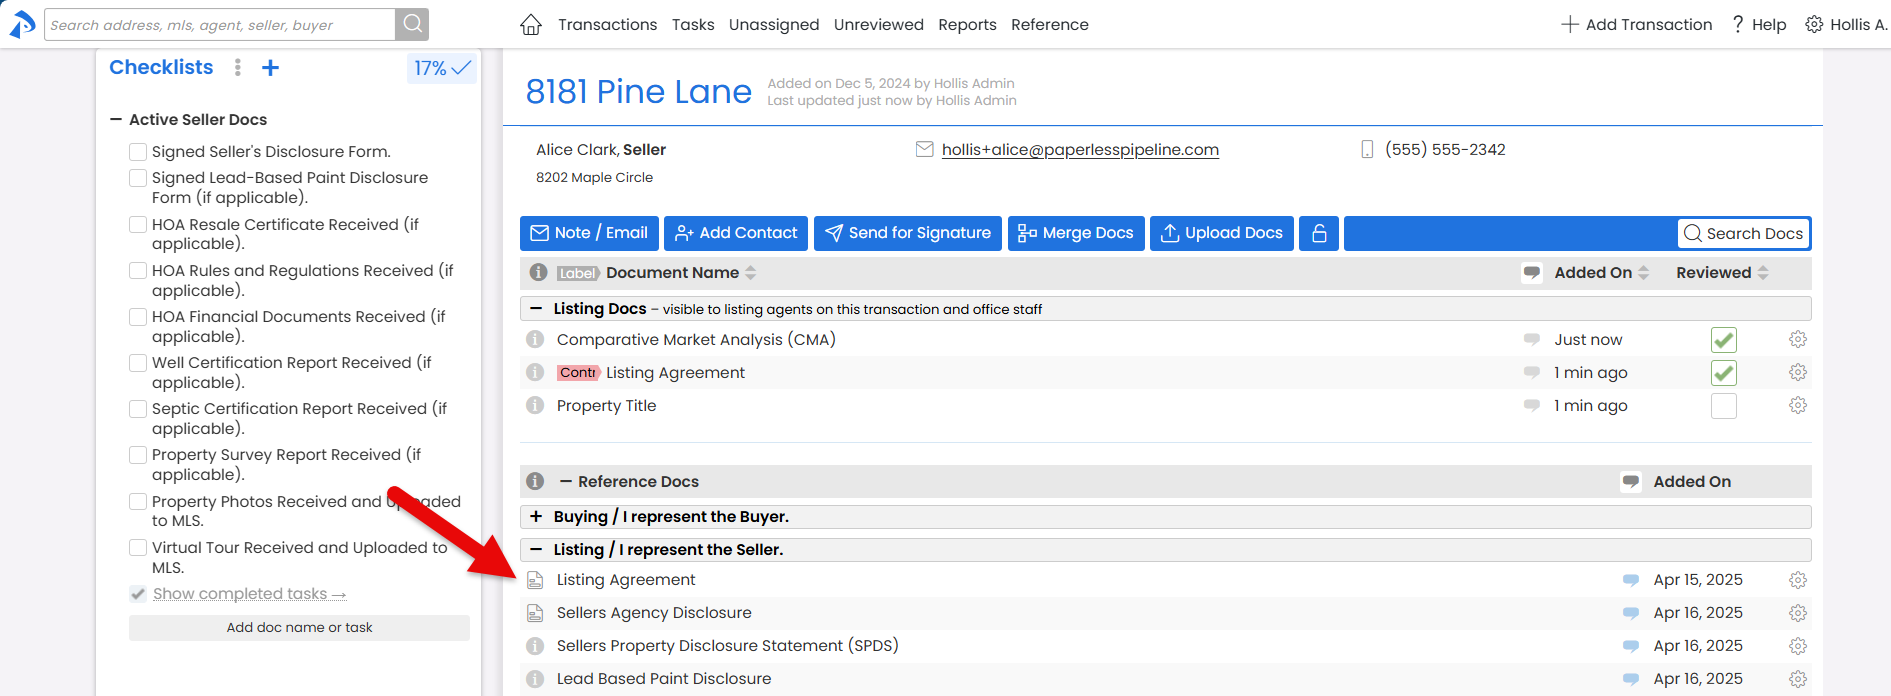
- Hover over the icon to see more details, including the number of pages and included signers.
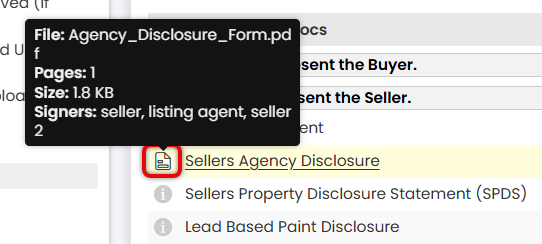
- Look for the form icon in the "i" column, this identifies a Reference Form.


Use Reference Forms to send signature requests faster with preset signers and consistent fields.
Who Can Do This: Anyone whose company is subscribed to Pipeline eSign.
To send a signature request using a Reference Form:
- Start a Signature Request
- Start by sending a signature request from a transaction or the Reference Library.
- Choose Reference Form(s)
- When choosing docs to be signed, select the Reference Form(s) you want to include.
- Review Signers
- Open the Signers dropdown and make sure all required signers are listed.
- Add additional signers by clicking [Add Party].
- Remove any signers that aren't needed by hovering over their name and clicking [x].

- Complete the Doc
- Fill in the remaining details you have and leave the rest for signers (outlined below).
Autofilled Transaction Info
Make sure the autofilled
Transaction Info is correct and complete. If anything is missing or innacurate, enter or fix it.
Document Text
Confirm standard text and details:
- Check that Document Text added by your admin makes sense for this request. Replace any placeholder text or add any missing info as needed.
- Add additional Document Text to fill in any standard details you're responsible for entering, such as disclaimers or other required text.
Signer Fields
Fill in the
 Signer fields you're responsible for. Leave the rest for the signer to complete.
Need help choosing the right fields? Check the Signature Fields Reference Guide for details on each field type.
- Check that
- Fill in the remaining details you have and leave the rest for signers (outlined below).
- Review Doc
- Before sending, scan the document to make sure everything is accurate and relevant.
- Delete any fields that aren’t needed for this request. This keeps the signing experience clean and avoids confusion.
- Send Request
- When the form is ready to be signed, finish sending the signature request as needed (depending on where you're sending it from).


 Signer fields you're responsible for. Leave the rest for the signer to complete.