Sends docs out for DocuSign signature faster and easier
Short version:
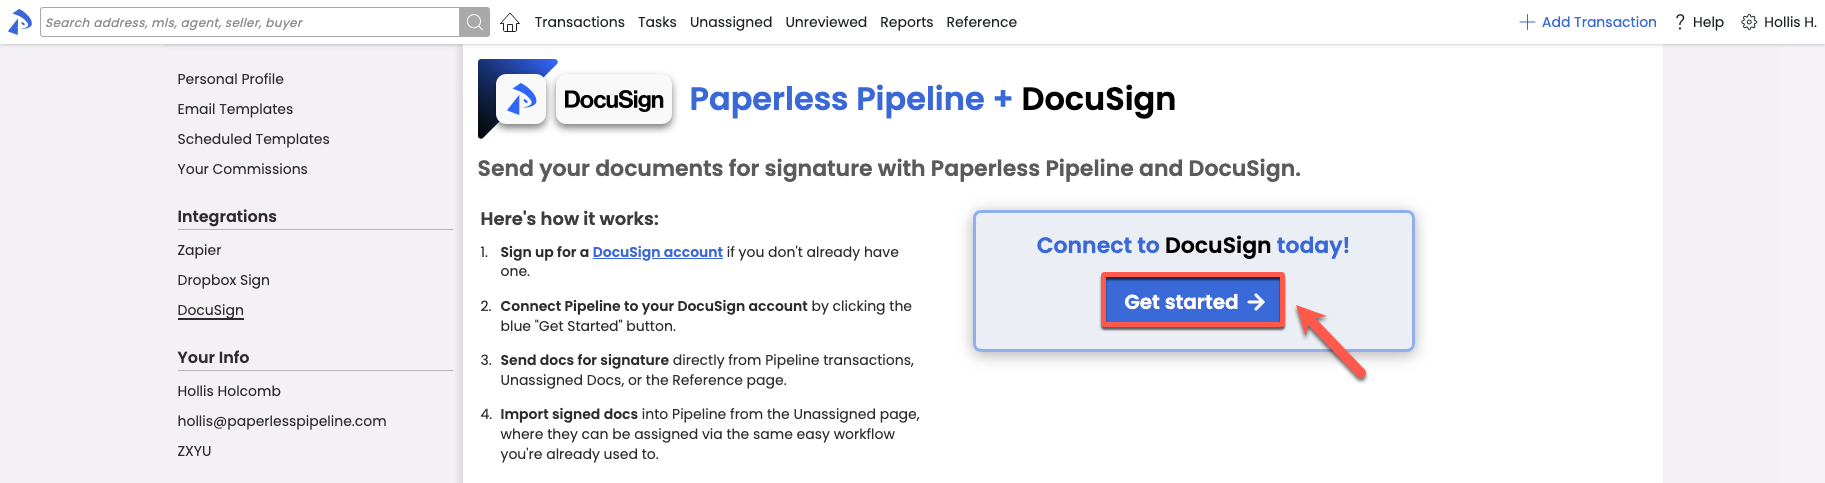
You can now send docs out for DocuSign signature directly from within Paperless Pipeline. Re-connect to DocuSign from your Personal Profile page, then when you send docs for signature from Reference or transactions, you'll do so without leaving Pipeline. Continue to view executed docs in DocuSign or import them back into Pipeline from Unassigned Docs.
Details:
You can now send docs out for DocuSign signature directly from within Paperless Pipeline, saving you the time and effort of having to send them to DocuSign, then visit DocuSign to send them from there.
To get started, you'll need to login to DocuSign from within Pipeline to re-establish the connection between Pipeline and DocuSign. Here's how:
- Click your name in the upper right corner of Pipeline, then [Personal Profile].
- Click [DocuSign] from the Integrations section of the left menu.
- Click [Get Started], then follow the prompts to connect to DocuSign.
- Then, when it's time to send a doc for signature, click [Send to Docusign] from transactions or from the Reference page, as you always have.
You'll be directed to specify your signers and signature fields, directly from within Pipeline. Once your sent docs are fully executed, as before, you can either view them in DocuSign, or import them back into Pipeline from the Unassigned Docs page. In the near future, those docs will be drawn back into Pipeline automatically.
Copy recipients privately when sending messages from within Pipeline
You can now add BCC (blind copy) recipients when sending message from within Pipeline. Click the BCC option to the right of the Recipients section to activate the field for any message.

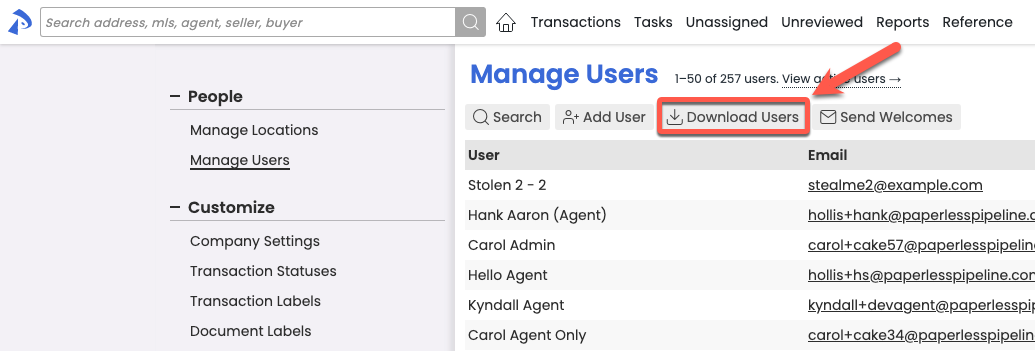
Download a custom list of users
The download option on the Manage Users page will now download whichever users are included in your current set of results. This will allow you to include or exclude inactive users or download a list of specific users, saving you from any filtering after-the-fact. To download, from Manage Users, Search, filter, or use the existing list of users, then click [Download Users] and follow the prompts.
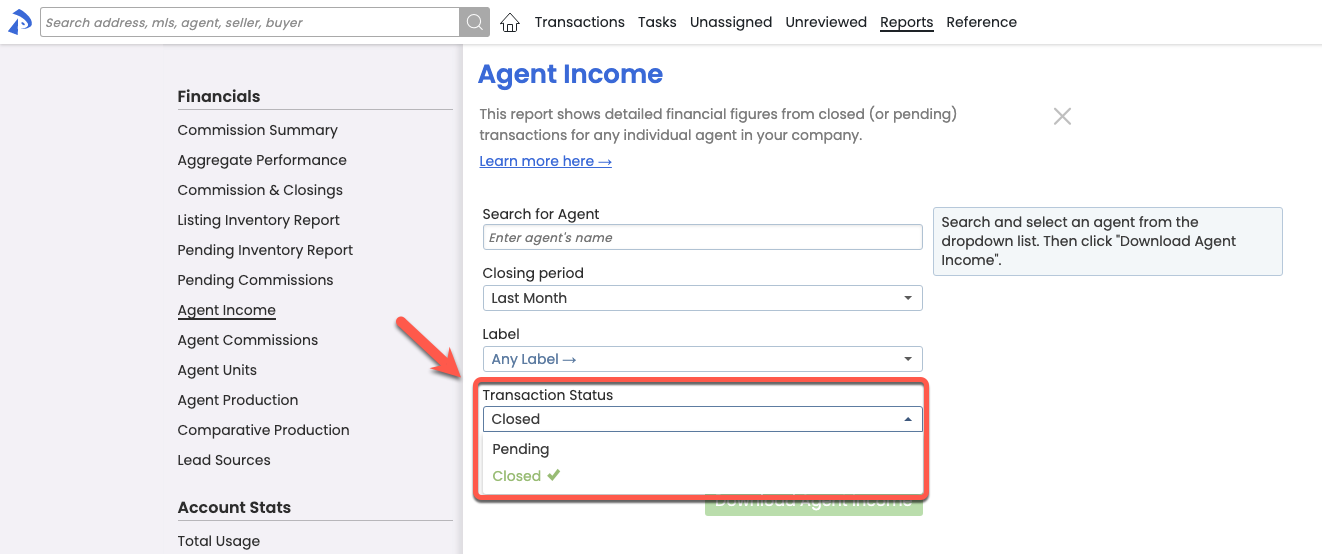
Assess agent Pending performance in a single report
You can now report on an agent's Pending commission totals when you need to assess their productivity based on Pending transactions. With the new Transaction Status option on the Agent Income report, you can run the report based on Closed or Pending transactions. From the Reports left menu, select [Agent Income], then select whether you'd like to view Closed or Pending transactions.
Find your task instantly when clicking from the Tasks page
When clicking a task on the Tasks page, the system will now scroll straight to the task on the transaction, and highlight it so you don't have to search for it.
Note that you need to have Checklist Scrolling turned on for the scrolling part of this feature to work.
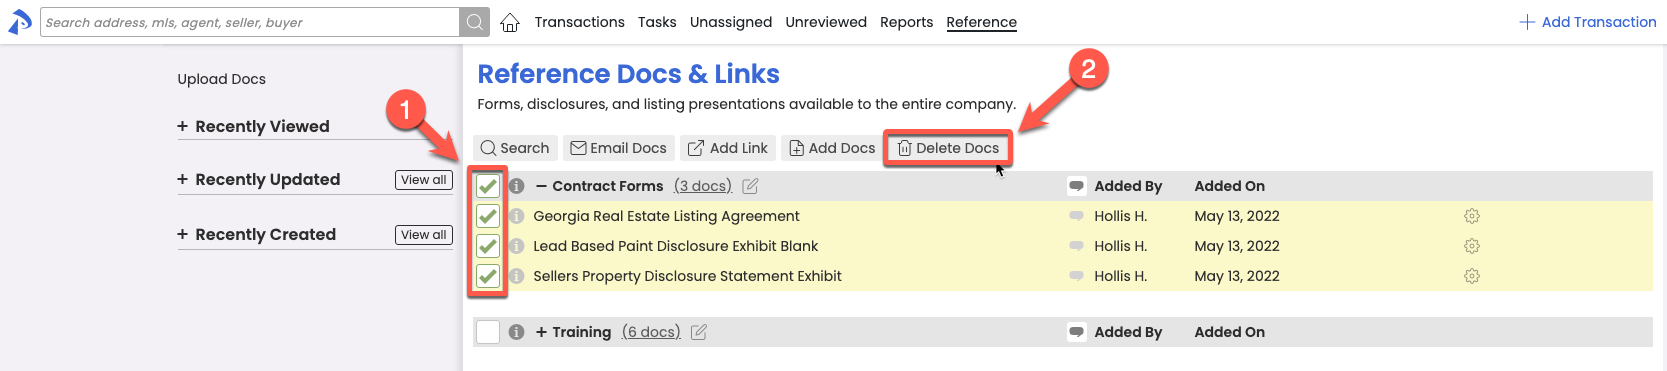
Save time by bulk deleting obsolete library items
Have obsolete material on your Reference page that needs to be removed or updated? You can now bulk delete multiple Reference Docs in a single action. Select multiple docs by checking each doc individually or by checking a category of docs. Then click [Delete Docs].
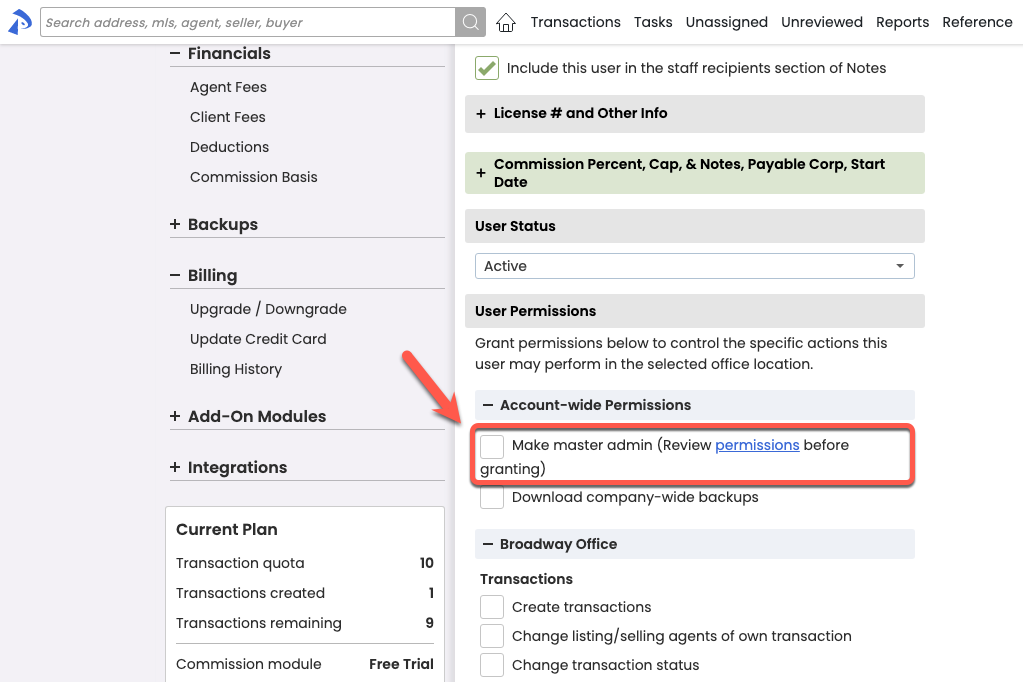
Save time by managing master admin access directly in Pipeline
Master admins may now fully manage the addition or removal of other master admins directly from Manage Users. Who is authorized to make such changes has not changed, only the ability to perform the changes directly from within Pipeline, has.
To add a master admin, an existing master admin can visit the desired user's profile, then check "Make master admin" from the "Account-wide Permissions" section.
To remove a master admin, an existing master admin can select the desired user's gear icon from the Manage Users list, then "Remove master admin"
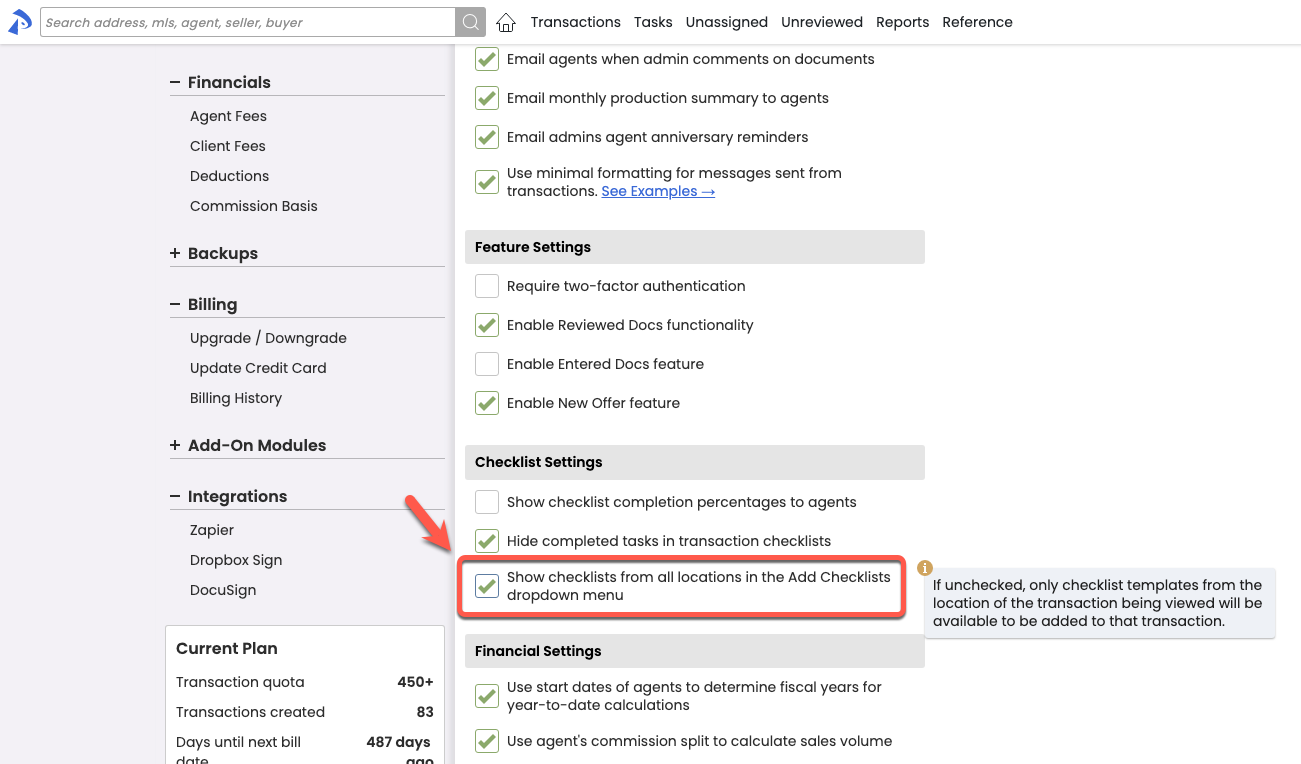
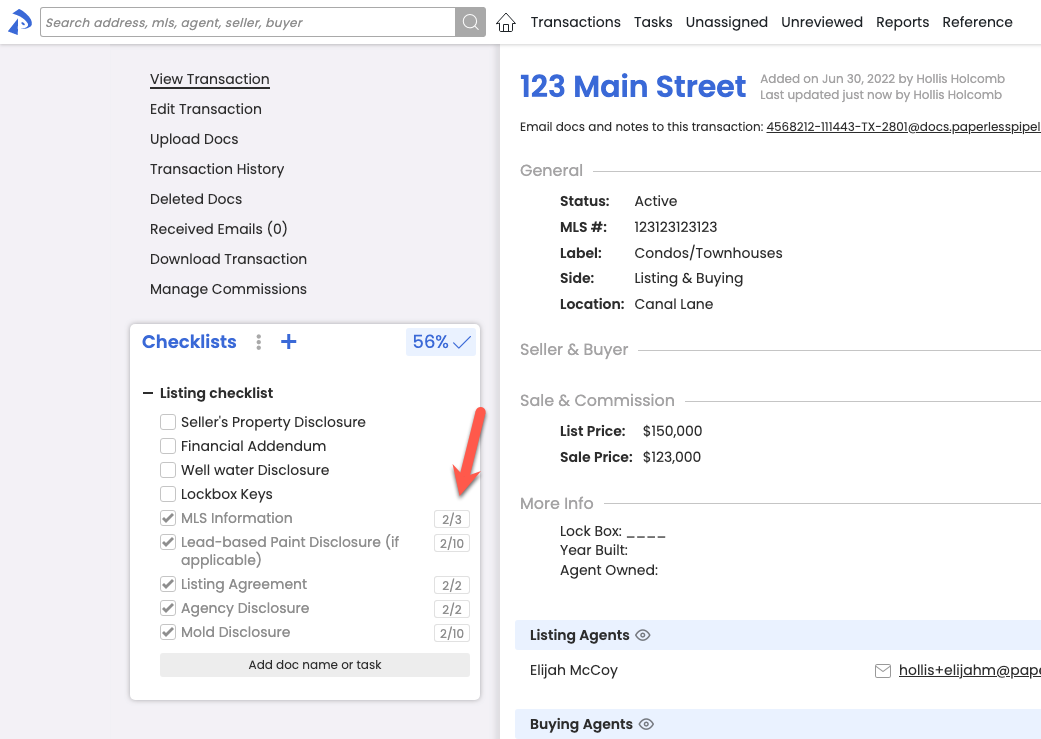
Make adding checklists to transactions easier by filtering out unneeded location-specific checklists
If your office has a need to only allow checklists that belong to a transcation's location to be added to that transaction, you can set your account accordingly.
This limitation is typically useful when you:
- Have more than one location
- Your checklists differ based on which location(s) they belong to
- You want to reduce the clutter of OR visibility to the checklists in the other location(s).
By default, all checklists are add-able to all transactions, regardless of the checklists' location. If you need to restrict that to only allow checklists from the transaction's location to be added, from Company Settings, uncheck "Show checklists from all locations in the Add Checklists dropdown menu" then Save. The setting can be changed at any time if your needs change in the future.
As always, feel free to setup a call→ if you ever have any questions about the setup of your checklists or feel they might benefit from a tune-up.
Know a completed task's original due date at-a-glance
The due dates of tasks will now continue to be displayed even after they have been marked as complete, saving time from hovering.
COMMISSION MODULE
Determine whether agents have met their cap at-a-glance when pending transactions need to be considered
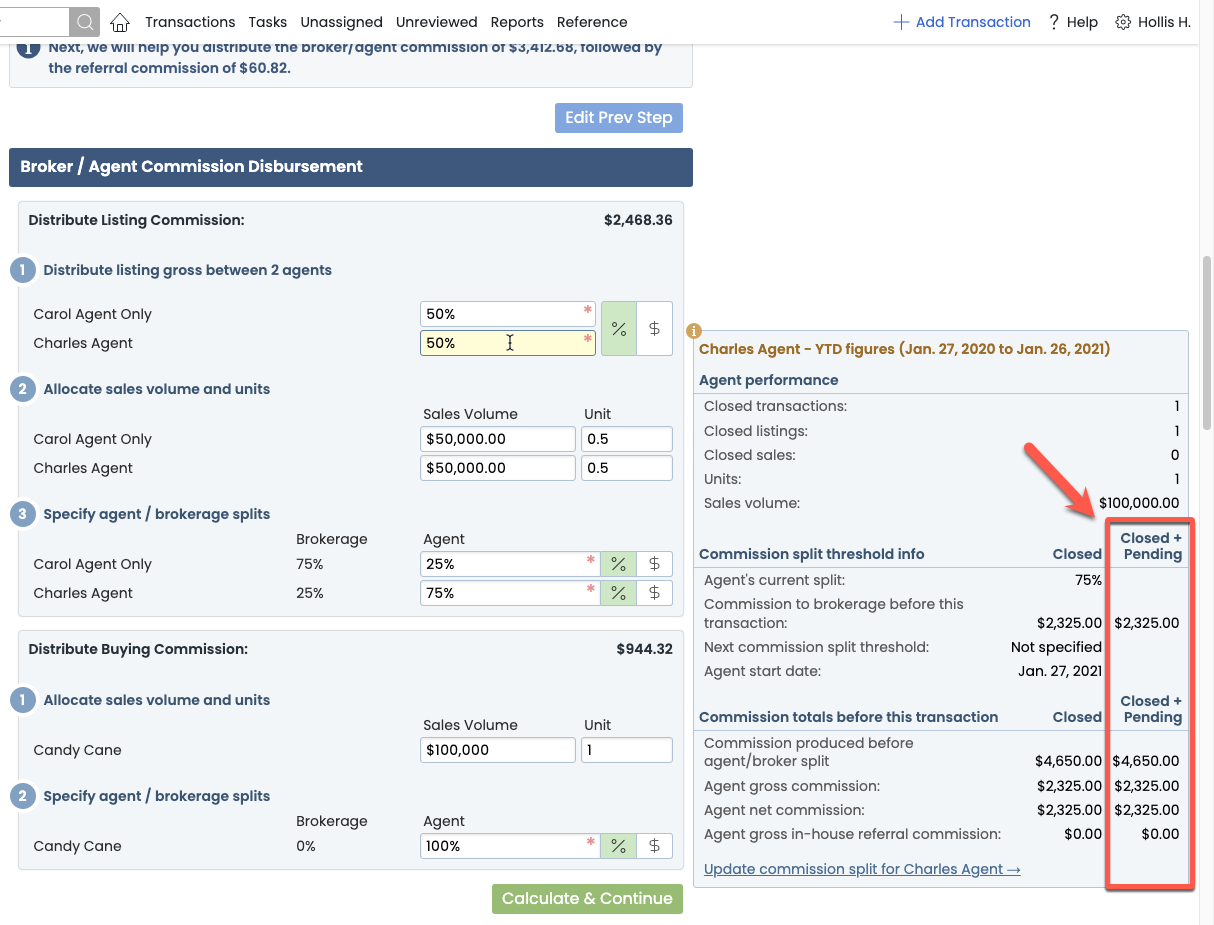
If processed Pending transactions should be considered when determining whether agents have reached their commission cap, you can now set your account to consider them. On the Company Settings page, check Display Pending transaction totals in the year-to-date commission threshold section, then Save.
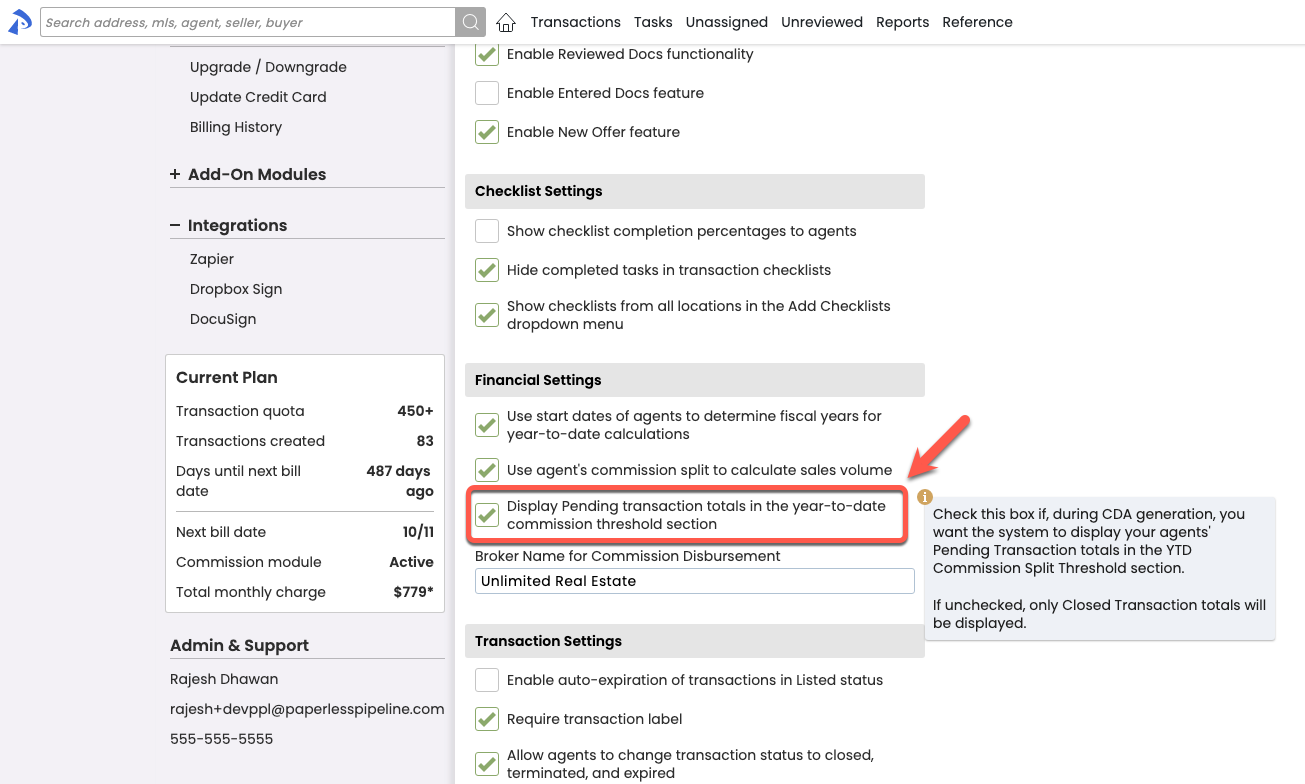
If enabled, when you're managing commissions, you'll see both Closed totals and Closed+Pending totals to help you determine whether a cap has been met.
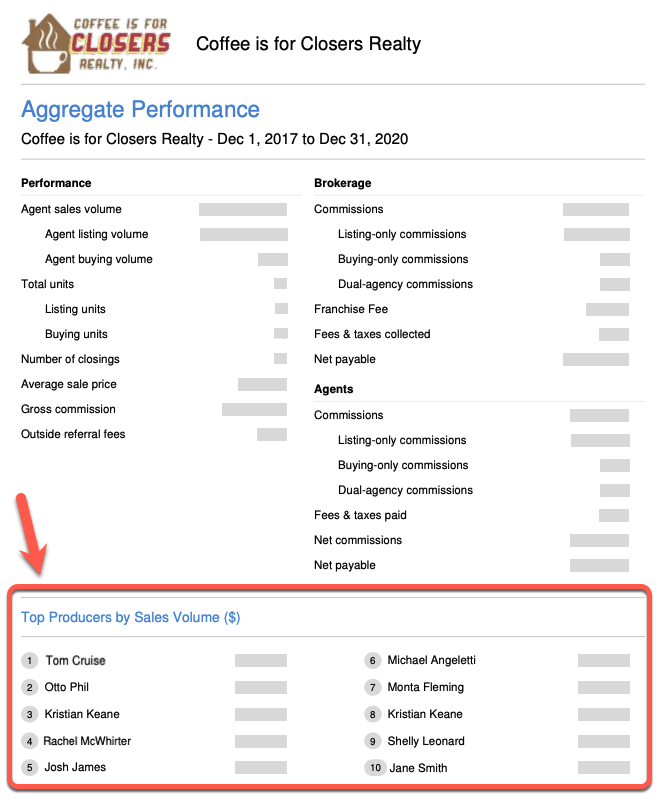
Top performer spots now exclusively for active users
The Top Performers section of the Aggregate Performance report will now exclude any inactive users, giving you a cleaner picture of who your active performers are.